The Fab Academy 2014
Digital Fabrication Laboratory. Department of Architecture.
Institute of Technology. EPS-CEU San Pablo CEU University
Adolfo Gutiérrez Sánchez
Architect
The Fab Academy 2014 Digital Fabrication Laboratory. Department of Architecture. Institute of Technology. EPS-CEU San Pablo CEU University |
Adolfo Gutiérrez Sánchez Architect |
|||
| Home | Portfolio | Files | ||
| NETWORK AND COMMUNICATION |
|
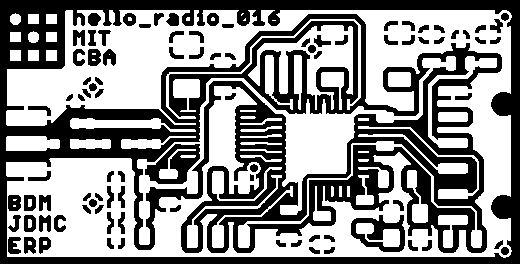
The assignment The assignment for this week was to make a Network board/s. The chosen board for this week was the Hello Radio from the FabLab. The Hello Radio board os a reversible radio that each of them can act as a receiver and as a transmiter. I will follow the tutorial explained on this link. I will do two identical boards in order they "talk" each other and they can send information from one place to another. |
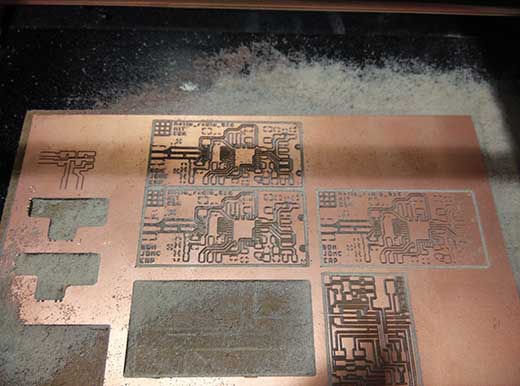
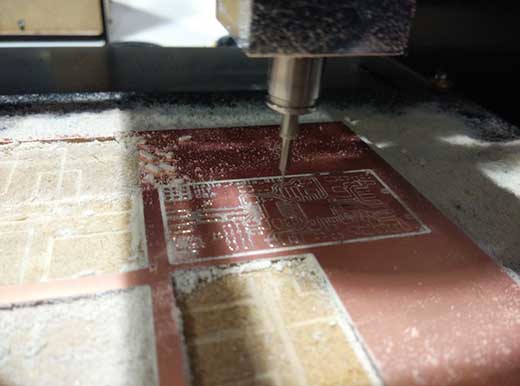
Cutting the board I did not want to do any changes on the existing board. It was pretty complicated to add anything to the board as it is very enclosed with all the existing components. This was a hard difficulty during the milling and welding. During the milling, I had some important problems wit my mill. The last week I broke my 1/64" mill, and there was not enough time to buy one through Ebay, so I had to improvise and but another one. The problem was that I could not find the specific 1/64" as the measures here of the rod and the wide are different from the USA. I had to keep on, and fatten the mill with some tape and decive the Modela to mill my board with a larger mill. After some attempts, that cost me a lot of time and some board surface, finally I could mill two good ones and start welding.
|
 |
|
 |
 |
 |
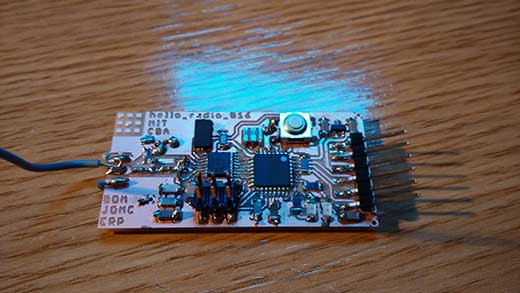
Welding the board This is the hardest board that I had to weld till this moment. The scheme of the board was pretty complicated and all the components were really closed each other. There were two microcontrollers (one was the radio controller) that even shared some of the pins. This was the first time I saw 0603 components. They are really tiny!! and so dificult to weld. Anyway, I tried to be very carefull with the welder in order not to burn any piece. Unweld some of the pieces in this board would have been really hard. One important thing in this board is that the GND is underneath the board. The GND is all over the exterior of the board, and it has to be welded from the top surface to the bottom surface. The best way to do that, is to mill the board with some holes and put a adhesive copper sheet underneath, and after that cross the whole board with a wire and weld to both sides. It is important that the copper sheet comes until the very extreme of the board and touches the both GND of the antenna. |
 |
|
|
Setting up the communication
To set up the communication, we have to do it separately, first one board and secondly the other boad. For the programming, I followed the tutorial from this link. - Download the firmware files - Get into Microsoft PowerShell from Windows and get into the folder where we have the firmware saved. - Do the following commands: make clean, make hex and make file, in both of the boards. If we have any problems doing it, doublecheck the connections as we may have some welding problems in our boards. I had to resolve some of them duting the programming, but it can be very frustrating.
|
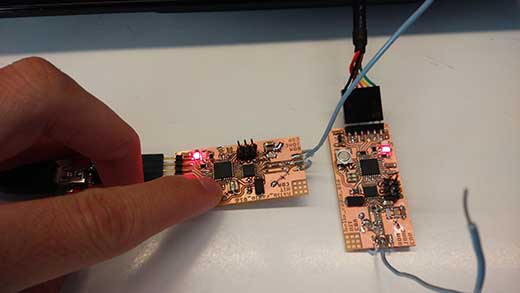
Programming the boards to do something When we have both of the boards connected, we can program one of them to send information into the other. As this very moment I could not program anything to send, so I just made a picture of both of the boards connected and transmitting between them We can see that when we press the button of one board, we see the corresponding LED from the both boards light. I tried to find the reach limits of the board separating the boards as far as possible, and I could proof that the wire is long enough to reach at least 100m, I will try it again buying the correct antenna to both of the boards, and see if it reaches 1km. |
|
.jpg)